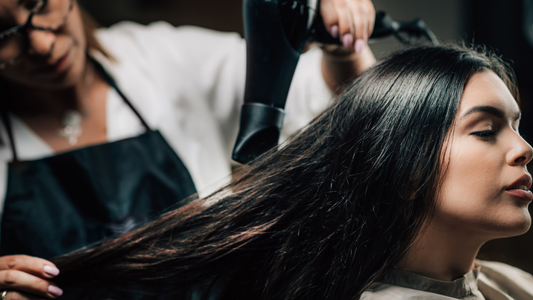
If you’re dreaming of smooth, frizz-free hair without the hassle or expense of salon visits, DIY keratin treatment kits may be the perfect solution. DIY keratin treatments provide professional-quality smoothing results at home, and with a product like Kera Mane Keratin Hair Treatment, you get salon-quality performance that’s accessible and easy to apply.
This guide offers a comprehensive introduction to DIY keratin treatment kits, covering how they work, their key benefits, and tips for achieving the best results at home.
What Are DIY Keratin Treatment Kits?
DIY keratin treatment kits are home-based hair treatments designed to replicate the salon experience. They contain keratin, a naturally occurring protein in hair, and other smoothing ingredients to improve hair texture, reduce frizz, and add shine. By applying keratin directly, these kits help seal and smooth the hair cuticle, making hair easier to manage and style.
DIY kits like Kera Mane’s keratin treatment allow you to perform a professional-style treatment at home. They include all the essential products—like the keratin solution, clarifying shampoo, and nourishing mask—needed for a complete treatment.
How DIY Keratin Treatment Kits Work:
- Clarifying Shampoo: The process starts with washing your hair with a clarifying shampoo to remove impurities and prepare the hair for the treatment.
- Keratin Solution Application: The keratin treatment is applied evenly across your hair, focusing on areas prone to frizz and dryness.
- Heat Activation: To bond the keratin with your hair, a flat iron is typically used to seal the treatment, leaving your hair smooth and shiny.
- Final Rinse and Mask: After the treatment is set, a hydrating mask (like Kera Mane’s Repair Max Mask) is applied to restore moisture and enhance shine.
Benefits of Using a DIY Keratin Treatment Kit at Home
DIY keratin treatments offer the luxury of a professional keratin application at home, giving you smooth, manageable hair at your convenience. Here are the primary benefits of using a DIY kit.
1. Cost-Effective Alternative to Salon Treatments
Salon keratin treatments can be expensive, often costing hundreds of dollars. DIY kits offer similar results at a fraction of the cost, making them an affordable option for achieving sleek, frizz-free hair without sacrificing quality.
- Budget Tip: With a DIY kit like Kera Mane, you can achieve salon-quality results for a one-time purchase, saving money in the long run.
2. Convenience and Flexibility
DIY kits provide the flexibility to do the treatment on your schedule. There’s no need to wait for a salon appointment, making it ideal for those with busy schedules or last-minute events.
- Scheduling Tip: Choose a time when you can devote a few hours to the process for best results—typically, a weekend afternoon works well for an at-home treatment.
3. Control Over the Process
When you apply a keratin treatment at home, you control the application process, ensuring every section of hair receives attention. This level of control can lead to more personalized results, allowing you to customize the amount of keratin for different sections depending on your hair type and texture.
- Application Tip: Pay extra attention to areas that tend to be frizzier, like the crown and ends, for even smoothness throughout your hair.
4. Long-Lasting Results
DIY keratin treatments can last up to three to four months with proper care. By following the right aftercare routine, you can enjoy smooth, shiny hair that’s easy to style for months.
- Longevity Tip: Use sulfate-free products and avoid washing your hair too frequently to maintain the results as long as possible.
How DIY Keratin Treatment Kits Like Kera Mane Work
The effectiveness of a DIY keratin kit depends on the quality of ingredients and a proper application technique. Here’s an overview of the main components in a kit like Kera Mane and how each contributes to the overall smoothing effect.
Step 1: Clarifying Shampoo
The clarifying shampoo is used to deeply cleanse your hair, removing oils, product buildup, and impurities. This step is critical for ensuring the keratin bonds effectively with your hair strands.
- Clarifying Tip: Make sure to thoroughly rinse out the shampoo to avoid residue, as it can interfere with the keratin application.
Step 2: Keratin Treatment Application
The keratin solution is applied evenly across small sections of your hair. This solution contains keratin proteins that bond with the hair shaft, smoothing down the cuticle and creating a protective layer that reduces frizz and enhances shine.
- Application Tip: Use gloves and a comb to ensure even distribution of the keratin treatment. Be thorough, as even coverage is essential for consistent results.
Step 3: Heat Activation
After applying the treatment, heat is used to seal in the keratin. This step usually involves blow-drying followed by flat ironing to lock in the treatment. The heat activates the keratin, binding it to the hair cuticle and creating a smooth, frizz-free surface.
- Heat Tip: Use a high-quality flat iron set to the recommended temperature to avoid damaging hair. Make sure to pass the flat iron over each section several times for optimal bonding.
Step 4: Hydrating Mask
Finally, a hydrating mask is applied to replenish moisture and protect the hair post-treatment. This step is particularly important as it locks in the smoothness and shine achieved with the keratin treatment.
- Mask Tip: Leave the mask on for the recommended time (usually 5–10 minutes) to ensure your hair is fully nourished and ready for styling.
Preparing for Your DIY Keratin Treatment: Essential Tips
For the best results with a DIY keratin treatment, a little preparation goes a long way. Follow these preparation tips to ensure your treatment goes smoothly.
1. Start with a Detox
Using a clarifying shampoo or a mild detox solution before your treatment helps remove any buildup that could prevent the keratin from bonding effectively. This is especially helpful if you regularly use heavy styling products.
2. Gather All Necessary Tools
Before starting, gather all tools, including gloves, a comb, a flat iron, and clips for sectioning. Having everything within reach makes the process easier and helps you work more efficiently.
3. Read Instructions Carefully
Each kit may have specific instructions, so take the time to read through them thoroughly. A high-quality kit like Kera Mane provides detailed steps to guide you, ensuring you don’t miss any important details.
Post-Treatment Care to Prolong Your DIY Keratin Results
After completing your DIY keratin treatment, following a proper aftercare routine helps prolong the results. Here’s how to keep your hair smooth and frizz-free for as long as possible.
1. Use Sulfate-Free Shampoos and Conditioners
Sulfates can strip the keratin from your hair, so use sulfate-free products to help maintain the treatment’s benefits. Look for products designed to hydrate and protect, keeping hair smooth and shiny.
2. Avoid Heat Styling for the First Few Days
For the first 2–3 days post-treatment, avoid washing or heat styling to give the keratin time to fully set. This is essential for ensuring the treatment bonds effectively and lasts longer.
3. Limit Hair Washing
Frequent washing can reduce the longevity of your keratin treatment. Aim to wash your hair no more than 2–3 times per week and use a dry shampoo in between if needed.
4. Sleep on a Silk Pillowcase
Silk pillowcases help reduce friction, which can keep your hair smooth and free of frizz overnight. Cotton pillowcases can cause tangling and dryness, so switching to silk is beneficial for post-treatment care.
Common Questions About DIY Keratin Treatment Kits
Q: How long do DIY keratin treatments last?
A: DIY keratin treatments can last up to 3–4 months with proper care, though the exact duration depends on your hair type and aftercare routine.
Q: Can I use a DIY keratin treatment on color-treated hair?
A: Yes, DIY keratin treatments are generally safe for color-treated hair, but it’s best to apply the color before the keratin treatment to prevent it from washing out prematurely.
Q: Are DIY keratin treatments safe?
A: Yes, when used according to the instructions, DIY keratin treatments are safe. Kera Mane is formulated without harsh chemicals, making it a safe choice for home application.
Why Kera Mane Is the Ideal Choice for a DIY Keratin Treatment
Kera Mane Keratin Hair Treatment provides all the benefits of a professional keratin treatment with the convenience of at-home application. Here’s what makes Kera Mane the best choice for a DIY experience:
- Formaldehyde-Free Formula: Kera Mane’s gentle, safe formula is designed for home use, providing salon-quality results without harsh chemicals.
- Complete Kit: Kera Mane includes everything you need for a full keratin treatment, from clarifying shampoo to a nourishing mask, ensuring a seamless process from start to finish.
- Easy Application: With detailed instructions, Kera Mane’s DIY kit makes it easy to achieve smooth, frizz-free results at home.
Conclusion: Enjoy Salon-Quality Hair with a DIY Keratin Treatment
With a DIY keratin treatment like Kera Mane, achieving smooth, sleek hair has never been easier. By understanding how these treatments work, their benefits, and the steps for proper application, you’re equipped to enjoy professional results from the comfort of home. Embrace the convenience and affordability of a DIY keratin treatment kit, and enjoy the confidence that comes with gorgeous, frizz-free hair.


