DIY keratin treatments offer the convenience of achieving smooth, frizz-free hair without visiting a salon. However, getting salon-quality results at home requires attention to detail, precise application, and a few expert techniques. To help you get the most out of your Kera Mane Keratin Hair Treatment, we’ve gathered some professional hairstylist tips and tricks that can make a big difference in your results.
This blog will guide you through professional strategies to maximize your DIY keratin experience, from preparation to aftercare, ensuring your hair looks and feels like it just stepped out of the salon.
Expert Tips for Prepping Your Hair Before a DIY Keratin Treatment
Before applying a keratin treatment, preparing your hair properly is crucial. The right preparation helps the keratin bond more effectively, leading to smoother, longer-lasting results.
1. Start with a Clarifying Shampoo
Professional stylists recommend using a clarifying shampoo to remove any product buildup, oils, and impurities from your hair. This creates a clean surface for the keratin to bond effectively to each strand.
- Tip: Wash your hair twice with the clarifying shampoo to ensure it’s completely clean. Avoid using conditioner before applying the keratin treatment, as this can prevent the keratin from fully absorbing.
2. Section Hair for Precise Application
Sectioning is key to achieving even coverage, especially for DIY treatments. Professional stylists typically divide the hair into 4-6 sections to work in manageable portions.
- Pro Tip: Use hair clips to keep each section secure. Start from the nape of the neck and work your way up, ensuring you don’t miss any strands along the way.
3. Use the Right Amount of Product
One of the most common DIY mistakes is applying too much keratin, which can weigh down the hair. Professionals recommend using just enough product to coat each strand without oversaturating.
- Application Tip: Begin with a small amount and use a fine-tooth comb to distribute it evenly. Apply more only if necessary, focusing on the mid-lengths and ends rather than the roots.
Professional Application Techniques for Even and Smooth Coverage
Applying keratin evenly across all strands is essential for uniform results. Here are some professional application techniques to help you achieve salon-quality smoothness.
1. Comb Through Each Section After Applying Keratin
After applying keratin to each section, comb through with a fine-tooth comb to ensure even distribution. This helps prevent clumping and ensures that each strand is coated from root to tip.
- Pro Tip: Use a clean comb for each section to avoid dragging excess product from one part of the hair to another.
2. Leave a Small Gap at the Roots
Avoid applying keratin directly to the roots, as this can create a flat, greasy appearance. Professional stylists recommend starting about ¼ inch away from the scalp to maintain natural volume.
- Volume Tip: Concentrate the product on the mid-lengths and ends for a smooth yet voluminous look.
3. Monitor Timing Carefully
Each DIY keratin kit has recommended processing times, which are important for achieving optimal results. Leaving the treatment on for too little or too long can affect its effectiveness.
- Stylist Tip: Set a timer for the processing period to ensure precise timing. Follow the specific instructions for your Kera Mane kit to avoid over- or under-processing.
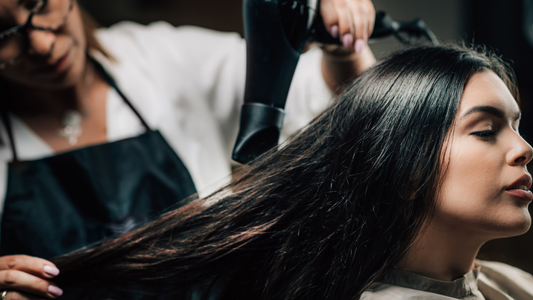
Activating the Keratin with Heat: Professional Flat Iron Techniques
Once applied, keratin treatments require heat to activate and bond with the hair. Proper use of a flat iron is essential for sealing in the treatment effectively.
1. Choose the Right Flat Iron and Temperature
Professionals recommend using a high-quality flat iron that maintains a consistent temperature. For most keratin treatments, a temperature between 350°F and 400°F is ideal. This range is high enough to seal the keratin without causing heat damage.
- Flat Iron Recommendation: Use a flat iron with ceramic or titanium plates for even heat distribution, which prevents hot spots and ensures consistent results.
2. Work in Small Sections
To achieve professional-level smoothness, work in small, thin sections, no wider than 1 inch. This ensures that each strand receives adequate heat for proper sealing.
- Technique: Pass the flat iron over each section 2-3 times slowly to lock in the keratin. Avoid going over any section too many times, as excessive heat can damage the hair and affect the treatment.
3. Angle the Flat Iron for a Natural Finish
To prevent overly straight or stiff hair, angle the flat iron slightly as you move down each section. This technique creates a natural finish, adding a touch of movement to the hair rather than a pin-straight effect.
- Stylist Secret: Angle the flat iron slightly outward at the ends for a soft, natural look that mimics salon results.
Professional Aftercare Tips for Long-Lasting Keratin Results
Aftercare is key to maintaining the smoothness and longevity of a keratin treatment. Follow these professional tips to keep your hair looking salon-fresh for months.
1. Avoid Washing for 48-72 Hours Post-Treatment
One of the most important steps after a keratin treatment is to avoid washing your hair for at least 48-72 hours. This allows the keratin to fully bond with the hair.
- Pro Tip: If you experience frizz or creases during the setting period, gently go over these sections with a flat iron on a low setting to maintain smoothness.
2. Switch to Sulfate-Free Shampoo and Conditioner
Sulfates can strip keratin from the hair, so professionals recommend using sulfate-free products to prolong the treatment. Look for products specifically labeled as keratin-safe to maintain the results.
- Suggested Products: Choose sulfate-free, hydrating formulas to keep hair soft, smooth, and frizz-free without compromising the treatment.
3. Limit Heat Styling and Always Use Heat Protection
While keratin treatments reduce the need for heat styling, some people still prefer to use hot tools. If you do, always apply a heat protectant spray to protect the keratin and prevent damage.
- Styling Tip: Try air-drying your hair whenever possible. If you need to use a blow dryer, use it on a low heat setting to avoid breaking down the keratin.
4. Deep Condition Weekly for Added Moisture
Keratin treatments can leave hair feeling smooth but sometimes a bit dry. Professionals suggest deep conditioning once a week to maintain softness and moisture balance.
- Product Recommendation: Use a keratin-friendly deep conditioning mask like Kera Mane Repair Max Mask to nourish and strengthen, helping to extend the life of your treatment.
Troubleshooting Common Issues with DIY Keratin Treatments
Even with careful application, you may encounter minor issues during your DIY keratin journey. Here’s how professionals suggest troubleshooting common problems.
1. Uneven Smoothness
If some areas of your hair are smoother than others, it’s usually due to uneven application or insufficient flat ironing.
- Solution: Gently touch up these sections with a flat iron set at the recommended temperature to improve consistency.
2. Greasy or Flat Appearance
Applying too much keratin or focusing too close to the roots can cause hair to look greasy or weighed down.
- Solution: Next time, start further from the roots and use a smaller amount of product. For immediate relief, apply a dry shampoo to add volume at the roots.
3. Frizz or Flyaways After Treatment
If you experience frizz post-treatment, it may be due to incomplete heat activation.
- Solution: Use a small amount of keratin-safe serum or light hair oil on dry areas, focusing on the ends. Avoid using heavy oils that can weigh down the hair.
Why Kera Mane is Ideal for Professional-Quality DIY Results
With Kera Mane Keratin Hair Treatment, you get a salon-quality formula that’s designed to deliver consistent, smooth, and long-lasting results. Here’s why Kera Mane is perfect for achieving professional results at home:
- Easy Application: The lightweight formula is easy to distribute evenly, minimizing the risk of clumping or build-up.
- Safe Ingredients: Kera Mane’s formaldehyde-free formula is gentle on hair and scalp, making it suitable for all hair types, including sensitive and color-treated hair.
- Extended Longevity: With proper care, Kera Mane can provide up to six months of smooth, frizz-free hair, reducing the need for frequent reapplication.
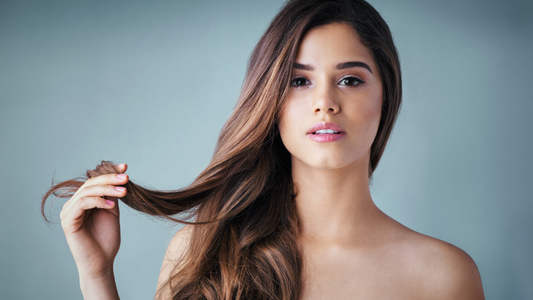
Conclusion: Get Salon-Quality Results with Professional Tips and Kera Mane
DIY keratin treatments can be just as effective as salon visits when done correctly. By following these professional tips and using high-quality products like Kera Mane Keratin Hair Treatment, you can achieve smooth, frizz-free hair that lasts.
With a little practice and the right techniques, you’ll master the art of DIY keratin and enjoy beautiful, manageable hair from the comfort of your home.