At-home keratin treatments have made it easier than ever to enjoy smooth, frizz-free hair without a salon visit. With a quality kit like Kera Mane Keratin Hair Treatment, you can achieve results that closely mirror professional treatments—right from home. However, achieving these results requires the right preparation, application, and aftercare techniques. This guide provides professional advice to help you achieve the sleek, salon-quality look you’re after.
Why Choose a DIY Keratin Treatment Kit?
DIY keratin kits, such as Kera Mane, are designed for easy, effective at-home application. They allow you to smooth your hair, reduce frizz, and enhance shine without the cost of a salon treatment. With the right approach, you can enjoy results that last up to three months, making it a convenient and affordable option.
Preparation for a Salon-Quality Keratin Treatment at Home
Getting salon-quality results starts with preparation. Proper pre-treatment steps ensure that your hair is ready for keratin application and help the treatment bond more effectively.
1. Start with a Clarifying Shampoo
A clarifying shampoo removes any residue, oils, and product buildup from your hair, which is essential for achieving an even, long-lasting keratin treatment. Kera Mane’s kit includes a clarifying shampoo, which provides the perfect foundation for your treatment.
- Pro Tip: Shampoo twice, focusing on the scalp and then working down the lengths of your hair. Rinse thoroughly to remove all traces of buildup.
2. Dry Your Hair Completely
Before applying the keratin treatment, make sure your hair is completely dry. Damp hair can dilute the product, reducing its effectiveness. Blow-dry or air-dry your hair after washing, ensuring no moisture remains.
- Pro Tip: Use a low to medium heat setting on your blow dryer to prevent any frizzing prior to treatment.
3. Divide Your Hair into Sections
Dividing your hair into small sections allows for even application and helps prevent missing any areas. For best results, use clips to section your hair into four main parts: top left, top right, bottom left, and bottom right. You can further subdivide each section for more precision.
Step-by-Step Application for Salon-Quality Results
Achieving smooth, frizz-free hair is all about proper application. The following steps ensure that you apply the keratin treatment evenly and effectively.
1. Apply the Keratin Treatment in Small Amounts
Using too much keratin product can lead to a heavy, greasy result. Instead, apply a small amount to each section of hair, starting from the roots and working down to the tips. Make sure each strand is lightly coated without saturating your hair.
- Pro Tip: Use a fine-tooth comb to distribute the product evenly through each section, removing any excess to avoid buildup.
2. Let the Product Sit for the Recommended Time
After application, allow the keratin treatment to sit for the time recommended by the kit instructions. For Kera Mane, this is typically between 20 and 40 minutes, depending on your hair’s texture and porosity.
- Note: Avoid touching or moving your hair during this time to ensure the treatment bonds evenly.
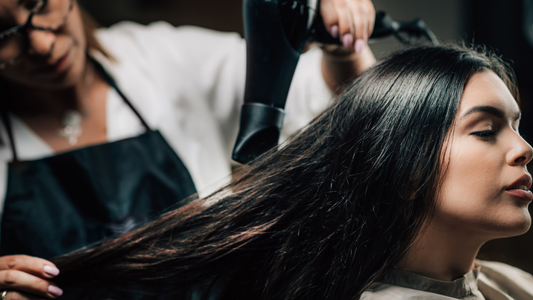
3. Blow-Dry with a Round Brush
Once the product has set, blow-dry your hair on a medium to high heat setting using a round brush. This technique helps to begin sealing the keratin into the hair and creates a sleek, smooth finish.
- Pro Tip: Direct the blow dryer’s nozzle downward to minimize flyaways and create a smooth cuticle surface.
4. Seal the Treatment with a Flat Iron
The final step in a keratin treatment is flat ironing to seal in the product. Using a flat iron at 350°F–450°F, depending on your hair type, pass over each section of hair 5–7 times. This heat is essential for locking in the keratin and creating long-lasting smoothness.
-
Flat Iron Temperature Guide:
- Fine or color-treated hair: 350°F–400°F
- Thick or coarse hair: 400°F–450°F
- Pro Tip: Work in very small sections (1-inch wide) and go over each section multiple times with steady, even pressure.
Aftercare Tips to Prolong Salon-Quality Results
Proper aftercare is essential to extending the life of your keratin treatment. By following these tips, you’ll maintain smoothness, shine, and frizz control for up to three months.
1. Avoid Washing for 48–72 Hours
The first few days after treatment are critical for the keratin to fully bond to your hair. Avoid washing your hair or getting it wet for 48 to 72 hours post-treatment.
- Pro Tip: If you need to shower, wear a shower cap and avoid humidity and steam.
2. Use Sulfate-Free Shampoo and Conditioner
Sulfates can strip away keratin, reducing the longevity of your treatment. Opt for sulfate-free products to preserve smoothness and shine.
- Product Recommendation: Look for a sulfate-free, color-safe formula to keep both your keratin treatment and any color intact.
3. Limit Heat Styling and Always Use Heat Protectant
Excessive heat styling can weaken the keratin layer. When you do use heat, apply a heat protectant spray to shield your hair and help it retain moisture.
- Pro Tip: Try to air dry as much as possible and limit the use of high-heat tools.
4. Sleep on a Silk Pillowcase
Cotton pillowcases create friction, which can cause frizz and disrupt the keratin’s smooth finish. Silk or satin pillowcases reduce friction, keeping your hair smooth while you sleep.
- Bonus: Silk pillowcases are also great for reducing breakage and keeping hair hydrated.
Frequently Asked Questions About Achieving Salon-Quality Results at Home
Q: Can I achieve the same smoothness with a DIY kit as I would at a salon?
A: Yes! With a high-quality DIY kit like Kera Mane and careful application, you can achieve results that rival salon treatments. Following each step precisely and using the recommended heat settings are key.
Q: How often should I reapply the keratin treatment?
A: Typically, every 3–4 months. This allows the previous treatment to naturally fade, preventing buildup and allowing you to reapply safely.
Q: Do I need any specific tools for my DIY keratin treatment?
A: Essential tools include a fine-tooth comb, sectioning clips, a blow dryer, and a flat iron that reaches the recommended temperature (350°F–450°F). Many kits, like Kera Mane, include some of these items to simplify the process.
Why Kera Mane is the Ideal Choice for DIY Salon-Quality Results
Kera Mane Keratin Hair Treatment stands out for its gentle, effective formula that delivers salon-like results at home. Here’s why it’s a top choice:
- Formaldehyde-Free Formula: Safe for sensitive scalps and free from harsh chemicals, making it ideal for at-home application.
- Sulfate-Free Aftercare Products: Kera Mane includes a clarifying shampoo and nourishing mask to maximize your results and keep your hair smooth and shiny.
- Step-by-Step Instructions: Designed with easy-to-follow steps, Kera Mane guides you through each phase, ensuring professional-quality results every time.
Conclusion: DIY Salon-Quality Keratin at Home with the Right Techniques
Achieving salon-quality results with a DIY keratin kit like Kera Mane is entirely possible by following professional advice on preparation, application, and aftercare. With these techniques, you can enjoy smooth, sleek hair that lasts for months, all without the high cost or time commitment of salon treatments. By committing to the process and using high-quality tools, you’ll be able to enjoy the best of keratin’s benefits from the comfort of your home.