DIY keratin treatment kits, like Kera Mane Keratin Hair Treatment, offer an affordable and convenient alternative to salon treatments, giving users smooth, frizz-free hair right from the comfort of their homes. But like any beauty solution, there are both advantages and challenges to consider. Here, we take an in-depth look at the pros and cons of using at-home keratin treatment kits to help you make an informed decision.
What is a DIY Keratin Treatment Kit?
A DIY keratin treatment kit is an at-home hair care product designed to mimic the results of a salon keratin treatment. These kits contain essential components, like a clarifying shampoo and keratin solution, allowing users to achieve a smooth, shiny finish on their own. Kera Mane is a leading example, providing a formaldehyde-free formula that’s gentle on hair and suitable for various hair types.
Pros of Using DIY Keratin Treatment Kits
1. Cost-Effective Solution
One of the most significant advantages of at-home keratin kits is the cost savings. Salon keratin treatments typically range from $200 to $500 per session, while DIY kits like Kera Mane cost between $60 and $120. For those looking to save money while achieving professional-quality results, DIY kits are an appealing option.
- Cost Comparison: Over a year, at-home kits can save hundreds of dollars compared to multiple salon visits.
2. Convenience and Flexibility
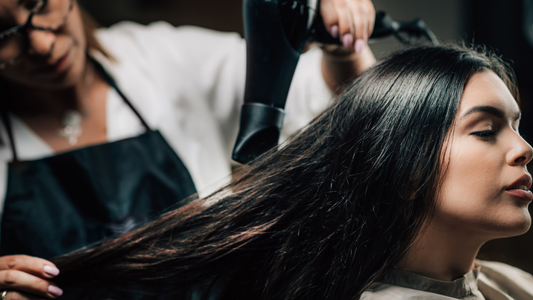
DIY kits offer the convenience of applying the treatment on your own schedule, without needing to book salon appointments or spend hours in a chair. This flexibility is especially beneficial for busy individuals who prefer handling their hair care at home.
- Flexibility Tip: With a DIY kit, you can touch up specific areas, like roots or frizzy sections, whenever needed.
3. Control Over Application
At-home keratin treatments allow for more control over the application process. You can customize the amount and placement of product, targeting only the areas where it’s needed most, such as frizzy ends or unruly strands.
- Personalization Perk: If you only need keratin in specific areas, a DIY kit provides this precision without requiring a full-head treatment.
4. Formulated for Safe At-Home Use
DIY keratin kits like Kera Mane are specially formulated for at-home use, ensuring they are easy to apply with minimal risk. Many of these kits are also formaldehyde-free, reducing the likelihood of irritation and making them suitable for sensitive scalps.
- Safety First: Kera Mane is free from harsh chemicals, prioritizing hair health with a gentle, effective formula.
5. Low Maintenance Between Applications
A high-quality at-home keratin treatment provides long-lasting results with minimal maintenance. By following simple aftercare practices, such as using sulfate-free shampoos and conditioners, you can extend the treatment’s effects without frequent touch-ups.
- Extended Results: DIY kits typically last 2–4 months, making them a low-maintenance solution for smooth, manageable hair.
Cons of Using DIY Keratin Treatment Kits
1. Application Learning Curve
Applying a keratin treatment at home requires following precise instructions to avoid common mistakes, like uneven coverage or product buildup. While most kits come with step-by-step directions, the application process may take practice to perfect.
- Solution: Follow the instructions closely and section your hair to ensure even application for the best results.
2. Potential for Uneven Results
Without professional expertise, achieving a perfectly smooth and even application can be challenging. Uneven application may lead to patchiness, with some areas smoother than others.
- Solution: To avoid unevenness, use a fine-tooth comb to distribute the product and work in small sections. Taking the time to ensure even distribution helps prevent issues like patchiness.
3. Limited Duration Compared to Some Salon Treatments
While DIY keratin kits can last 2–4 months, some salon treatments can last slightly longer due to the high-quality professional products and expertise used in application. For those looking for ultra-long-lasting results, salon treatments may have a slight edge.
- DIY Tip: Proper aftercare, like using sulfate-free shampoos and limiting heat styling, can maximize the lifespan of your DIY treatment.
4. Initial Product and Tool Investment
Applying a DIY keratin treatment requires some basic tools like a flat iron, gloves, and clips, which may not be included in all kits. For first-time users, these additional tools may represent a small upfront investment.
- Solution: Many kits, including Kera Mane, include essential tools, making it a convenient choice for first-timers.
5. Not Suitable for All Hair Types
Certain hair types, particularly those with excessive damage or extremely curly textures, may not achieve the desired results with an at-home kit. Professional salon treatments can sometimes offer more tailored solutions for highly textured or damaged hair, as stylists can adjust formulas or techniques.
- Consideration: While DIY kits are effective for a broad range of hair types, those with specific concerns should consult a stylist before applying a keratin treatment at home.
DIY Keratin Kits vs. Salon Treatments: Pros and Cons Comparison Table
| Feature | DIY Keratin Kit (e.g., Kera Mane) | Salon Keratin Treatment |
|---|---|---|
| Cost | $30–$120 | $200–$500 per session |
| Convenience | At-home, on your own schedule | Requires salon appointment |
| Control Over Application | High control, customizable | Less control, fully handled by stylist |
| Duration | 2–4 months | 3–5 months |
| Learning Curve | Moderate, requires careful application | Minimal, done by a professional |
| Tool Requirement | May need additional tools | All tools provided by salon |
| Suitability for Hair Types | Broad, but may vary by kit | Customized for all hair types |
Tips for Choosing and Applying a DIY Keratin Treatment Kit
If you decide to try a DIY keratin kit, choosing the right product and following the proper steps are essential for achieving salon-quality results. Here are some tips to help:
1. Choose a High-Quality, Formaldehyde-Free Formula
Look for a formula that is formaldehyde-free, like Kera Mane, which provides smoothness and shine without harsh chemicals. Formaldehyde-free options are safer for at-home use and are less likely to cause scalp irritation or unwanted side effects.
2. Follow the Instructions Carefully
Detailed instructions come with most kits, outlining steps for application, timing, and aftercare. Follow these instructions closely, as skipping or altering steps can compromise your results.
3. Use a Fine-Tooth Comb for Even Application
After applying the keratin solution, comb through each section to ensure even distribution. This helps prevent areas of buildup or uneven texture and enhances the smooth finish.
4. Invest in Aftercare Products
Maintaining your keratin treatment is easy with sulfate-free shampoos and conditioners, which preserve the keratin’s effects. Avoid washing too frequently, and limit heat styling to prolong your results.
Frequently Asked Questions About DIY Keratin Kits
Q: Can I reapply my DIY keratin treatment if I don’t get the desired results?
A: Yes, but wait a few weeks before reapplying a full treatment to prevent product buildup. You can also spot-treat areas that need extra smoothness using a smaller amount of product.
Q: Are DIY keratin kits as effective as salon treatments?
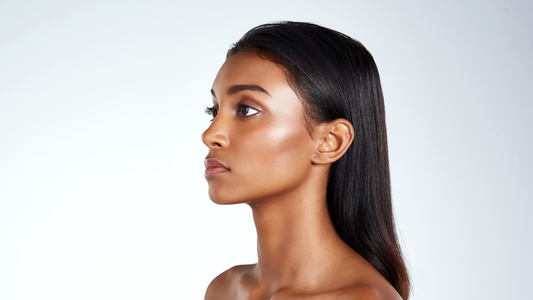
A: High-quality DIY kits, like Kera Mane, are designed to deliver results similar to salon treatments. With proper application and aftercare, you can achieve smooth, frizz-free hair at home, though results may vary by individual hair type and technique.
Q: How often should I use a DIY keratin kit?
A: Every 2–4 months is ideal for maintaining smoothness without overloading your hair with keratin. This timeframe allows the previous treatment to fade before reapplying.
Why Kera Mane is the Ideal DIY Keratin Treatment Choice
Kera Mane Keratin Hair Treatment offers a high-quality, formaldehyde-free formula that’s safe and effective for at-home use. Here’s why it stands out:
- Cost-Effective and Convenient: Kera Mane provides salon-quality results at a fraction of the salon price, allowing you to enjoy smooth, manageable hair without leaving your home.
- Complete Kit with Essential Tools: The kit includes a clarifying shampoo and hydrating mask, ensuring you have everything needed for successful application and maintenance.
- Gentle and Versatile: Suitable for various hair types, Kera Mane offers long-lasting results without harsh chemicals, making it ideal for sensitive scalps and color-treated hair.
Conclusion: DIY or Salon? Finding the Right Keratin Treatment for You
Choosing between a DIY keratin treatment kit and a salon treatment depends on your budget, hair type, and styling preferences. For those seeking an affordable, flexible, and effective solution, DIY kits like Kera Mane offer impressive results. By weighing the pros and cons, you can determine the best keratin treatment option for your lifestyle and enjoy the benefits of sleek, frizz-free hair.