DIY keratin treatments are a game-changer for anyone looking to achieve smooth, sleek, and frizz-free hair at home. However, while the application of keratin products is essential, the real magic happens with heat. Heat plays a critical role in ensuring the keratin bonds to your hair strands effectively, sealing in the benefits of the treatment and giving you long-lasting results.
In this blog, we’ll dive deep into the role of heat in DIY keratin treatments, discussing why it’s so crucial and how to apply it correctly at home. We’ll also provide expert tips on the best practices for using heat in the keratin treatment process to maximize the effectiveness of your Kera Mane Keratin Hair Treatment for salon-quality results.
Why Heat is Essential in DIY Keratin Treatments
Keratin treatments work by infusing the hair with keratin—a protein that smooths, strengthens, and repairs damaged hair. However, simply applying the keratin product isn’t enough. Heat is the catalyst that activates the treatment and bonds the keratin to the hair shaft. Without proper heat application, the treatment won’t adhere properly, leading to uneven or short-lived results.
Here’s how heat contributes to the success of a keratin treatment:
- Heat Seals the Keratin into the Hair: Heat opens up the hair cuticles, allowing the keratin to penetrate deep into the hair shaft. As you apply heat, typically through a flat iron, the keratin gets sealed into place, ensuring smoothness and frizz control.
- Long-Lasting Results: Proper heat application ensures that the keratin treatment lasts for up to 3-6 months. Without sufficient heat, the treatment may wash out sooner or fail to bond fully to the hair.
- Smoothing and Straightening: Heat helps straighten the hair during the keratin process, giving you a sleek, polished look. The amount of heat applied can also affect the final texture of your hair—whether you want to maintain some wave or go pin-straight.
Best Practices for Using Heat in a DIY Keratin Treatment
To get the best results from your DIY keratin treatment, it’s important to use heat correctly. Follow these best practices to ensure you apply the right amount of heat safely and effectively at home.
1. Use the Right Tools
The quality of your heat tools can make or break your keratin treatment. Here’s what you’ll need:
- High-Quality Flat Iron: A ceramic or titanium flat iron is best for evenly distributing heat and preventing hot spots that can cause damage. The flat iron should be able to reach temperatures between 350°F and 450°F, depending on your hair type.
- Blow Dryer with a Concentrator Nozzle: A blow dryer helps dry your hair completely before applying the flat iron. Look for one with a concentrator nozzle to direct the airflow for a smooth finish.
2. Temperature Settings for Different Hair Types
The temperature of the flat iron should be adjusted based on your hair type. Using the right heat setting will ensure the keratin bonds effectively without damaging your hair.
- Fine or Damaged Hair: Use a lower heat setting between 350°F and 375°F to avoid excessive heat that can weaken or damage delicate hair.
- Normal Hair: For medium-textured hair, a temperature range of 375°F to 400°F is ideal for sealing in the keratin without overexposing your hair to heat.
- Thick, Coarse, or Curly Hair: Thicker hair types require higher heat to fully seal the keratin treatment. Use a flat iron set between 400°F and 450°F for the best results.
Pro Tip: Always start with a lower heat setting and gradually increase if necessary, especially if you’re unsure about your hair’s heat tolerance.
3. Drying Your Hair Completely
One of the most important steps before applying the flat iron is to ensure your hair is 100% dry. Applying heat to damp hair during the keratin treatment can cause damage, create uneven results, or make the keratin ineffective.
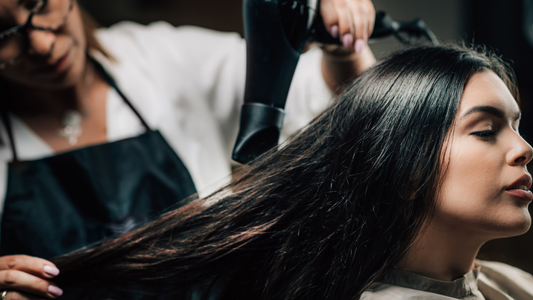
- Blow-Dry Your Hair Thoroughly: After applying the keratin treatment, use a blow dryer with a concentrator nozzle to dry your hair fully. Keep the dryer moving constantly to avoid heat damage.
- Don’t Skip This Step: Your hair should feel completely dry to the touch before using the flat iron. Any residual moisture can interfere with the treatment and reduce its longevity.
4. Flat Ironing for Keratin Treatment Success
Once your hair is dry, it’s time to apply the flat iron to seal in the keratin. Follow these steps for the best results:
- Section Your Hair: Divide your hair into small, manageable sections (about 1-inch wide). Working in smaller sections ensures the keratin is sealed evenly and completely into every strand.
- Flat Iron Each Section 5-7 Times: Pass the flat iron over each section 5-7 times to ensure the keratin bonds fully. Use smooth, continuous motions from root to tip, and avoid stopping in one spot to prevent overheating.
- Keep the Flat Iron Moving: Don’t leave the flat iron in one place for too long. Continuously glide the flat iron through your hair to avoid heat damage and to ensure even sealing.
Pro Tip: If you want to retain some texture or waves, use the flat iron fewer times (about 3-4 passes) or at a slightly lower heat setting.
5. Safety Tips for Using Heat in DIY Keratin Treatments
While heat is crucial for the success of your keratin treatment, it’s important to apply it safely to avoid damaging your hair or skin. Here are a few safety tips to keep in mind:
- Use a Heat Protectant: Even though keratin treatments provide some heat protection, it’s always a good idea to apply a heat protectant spray before blow-drying or flat ironing. This adds an extra layer of defense against heat damage.
- Protect Your Scalp and Skin: Be cautious when using the flat iron near your scalp or hairline to avoid burns. Using a fine-tooth comb to guide the flat iron through your hair can help maintain control and precision.
- Avoid Overheating: Excessive heat can lead to dryness, breakage, or even burn the hair, especially if the flat iron is left in one spot for too long. Keep the iron moving and stick to the recommended number of passes for your hair type.
The Role of Heat in Kera Mane’s Keratin Hair Treatment
Kera Mane Keratin Hair Treatment is specially formulated to work with heat, making it easy to achieve smooth, salon-quality results at home. Here’s how heat activates the benefits of Kera Mane:
- Heat-Sealing the Keratin: The flat iron’s heat helps lock the keratin into the hair shaft, ensuring long-lasting smoothness and frizz control.
- Customizable Results: Depending on the amount of heat you use, you can customize your final look—whether you want completely straight hair or prefer to retain some natural waves.
- Formaldehyde-Free and Safe: Kera Mane’s formaldehyde-free formula is designed to work with heat without releasing harmful fumes, making it a safer choice for at-home use.
Post-Treatment Heat Styling Tips
Once you’ve completed your keratin treatment, you can still use heat styling tools like blow dryers and flat irons—but it’s important to be mindful of how much heat you apply. Here are some tips for post-treatment heat styling:
- Lower Heat Settings: After your treatment, your hair should be more manageable, meaning you can use lower heat settings on your styling tools to achieve the same results.
- Use Heat Sparingly: While keratin-treated hair can handle heat, try to limit the use of high-heat styling tools to maintain the longevity of the treatment.
- Heat Protectant: Continue using a heat protectant spray during styling to keep your hair healthy and prevent heat damage.
Conclusion
Heat is the key to unlocking the full potential of your DIY keratin treatment. Whether you have fine, thick, or curly hair, applying the right amount of heat through blow-drying and flat ironing ensures that the keratin bonds effectively, leaving you with smooth, sleek hair for months.
By following the best practices for heat application and using high-quality tools, you can achieve professional-level results from the comfort of your home. Kera Mane Keratin Hair Treatment is designed to work with heat, providing long-lasting, frizz-free hair while maintaining the health and integrity of your locks.
By mastering the role of heat in the keratin process, you can enjoy smooth, manageable, and shiny hair without the salon price tag.


